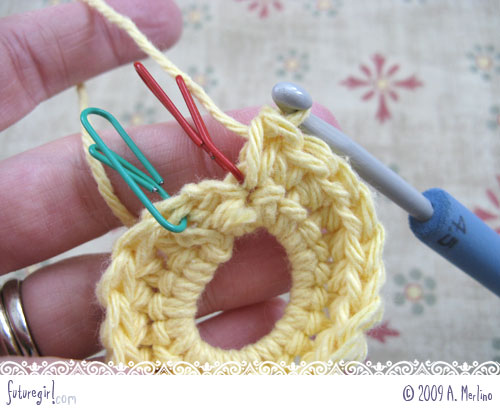
Hat (make one)
With BLACK yarn, form a ring.
Round 1: 4 sc in ring.
Round 2: 1 inc in each sc. (8 sc)
Round 3: *1 inc in next sc, 1 sc in next 3 sc**, rep from * to ** once more. (10 sc)
Round 4: *1 inc in next sc, 1 sc in next 4 sc**, rep from * to ** once more. (12 sc)
Round 5: *1 inc in next sc, 1 sc in next 5 sc**, rep from * to ** once more. (14 sc)
Round 6: *1 inc in next sc, 1 sc in next 6 sc**, rep from * to ** once more. (16 sc)
Sl st in next sc, then cut yarn. This piece is Hat Piece A.
Repeat rounds 1-6 once more for Hat Piece B. Do not sl st or cut yarn.
Round 7: 1 sc in next 8 sc. Insert hook into first stitch after sl st made on Hat Piece A and
continue to make 1 sc in next 16 sc. Insert hook back into Hat Piece B and make 1 sc in
next 8 sc. (One round completed with 32 sc)
With the tail from Hat Piece A, close the gap between the two pieces of the hat.
Round 8: *1 inc in next sc, 1 sc in next 15 sc**, rep from * to ** once more. (34 sc)
Round 9-11: 1 sc in each sc (34 sc)
Round 10: 1 sc in flo of each sc across (34 sc)
Round 11: *1 inc, 1 sc in next 7 sc, 1 inc, 1 sc in next 8 sc**, rep from * to ** once more. (38 sc)
Round 12: *1 inc, 1 sc in next 8 sc, 1 inc, 1 sc in next 9 sc**, rep from * to ** once more. (42 sc)
Cut a long tail, which will be used for sewing the hat to Cheese-kun’s head later on.
You will stuff the hat lightly, then attach the hat to the head through the back-loops (from round 10).
I attached my hat sometime around Round 59 of the body, because it was easier for me to sew, but you
can also attach it after you have finished making the body.
Arms (make two)
With GOLD yarn, form a ring.
Round 1: 5 sc in ring.
Round 2: 1 inc in each sc. (10 sc)
Round 3: *1 inc, 1 sc in next sc**, rep from * to ** around. (15 sc)
Round 4-11: 1 sc in each sc. (15 sc)
Cut a long tail, which will be used for sewing the arms to the body.
Legs (make two)
With GOLD yarn, form a ring.
Round 1: 6 sc in ring.
Round 2: 1 inc in each sc. (12 sc)
Round 3: *1 inc, 1 sc in next sc**, rep from * to ** around. (18 sc)
Round 4: *1 inc, 1 sc in next 2 sc**, rep from * to ** around. (24 sc)
Round 5-6: 1 sc in each sc. (24 sc)
Round 7: *1 inc, 1 sc in next 3 sc**, rep from * to ** around. (30 sc)
Round 8-13: 1 sc in each sc. (30 sc)
Sl st in next sc, then cut yarn. Repeat for second leg.
You now have Leg Piece A and Leg Piece B.
The third leg will be created, and joined with the first two pieces, then you will continue to make the body.
Third Leg & Body
Work third leg following rounds 1-13 of the leg instructions. Do not slip stitch or cut yarn.
Round 14: 1 sc in next 15 sc. Insert hook into first stitch after sl st made on Leg Piece A and
continue to make 1 sc in next 15 sc. Insert hook into first stitch after sl st made on Leg
Piece B and continue to make 1 sc in next 30 sc. Insert hook back into Leg Piece A and
make 1 sc in next 15 sc. Insert hook back into the third leg and make 1 sc in next 15 sc.
(One round completed with 90 sc)
With the tails from Leg Piece A and Leg Piece B, close the gap between the three leg pieces.
Round 15: *1 dec, 1 sc in next 7 sc**, rep from * to ** around. (80 sc)
Round 16-20: 1 sc in each sc. (80 sc)
Round 21: *1 dec, 1 sc in next 6 sc**, rep from * to ** around. (70 sc)
Round 22-24: 1 sc in each sc. (70 sc)
Round 25: *1 dec, 1 sc in next 5 sc**, rep from * to ** around. (60 sc)
Round 26: 1 sc in each sc. (60 sc)
Round 27: *1 inc, 1 sc in next 5 sc**, rep from * to ** around. (70 sc)
Round 28-38: 1 sc in each sc. (70 sc)
Round 39: *1 inc, 1 sc in next 6 sc**, rep from * to ** around. (80 sc)
At this point, stitch the arms to the row just below the one you created.
Also, begin stuffing the legs and body with polyester fiber-fill. Continue to fill as you work more rounds.
Round 40-46: 1 sc in each sc. (80 sc)
Round 47: *1 dec, 1 sc in next 6 sc**, rep from * to ** around. (70 sc)
Round 48-49: 1 sc in each sc. (70 sc)
Round 50: *1 dec, 1 sc in next 5 sc**, rep from * to ** around. (60 sc)
Round 51-52: 1 sc in each sc. (60 sc)
Round 53: *1 dec, 1 sc in next 4 sc**, rep from * to ** around. (50 sc)
Round 54-55: 1 sc in each sc. (50 sc)
At this point, embroider the face using black yarn. I embroidered using chain stitch.
Round 56: *1 dec, 1 sc in next 3 sc**, rep from * to ** around. (40 sc)
Round 57: *1 dec, 1 sc in next 2 sc**, rep from * to ** around. (30 sc)
Round 58: *1 dec, 1 sc in next 3 sc**, rep from * to ** around. (24 sc)
Round 59: *1 dec, 1 sc in next 2 sc**, rep from * to ** around. (18 sc)
Round 60: *1 dec, 1 sc in next sc**, rep from * to ** around. (12 sc)
At this point, make sure you have completely stuffed Cheese-kun.
Round 61: dec over every 2 sc (6 sc)
Cut yarn (leaving a few inches tail), and weave the tail through all 6 sc. Pull tight to close the hole, then
pull yarn tail through the center into the body.